


As someone who constantly works with digital images, it’s inevitable that at one point you’ll need to make the same adjustments to a larger group of files. Perhaps you’ll need to optimize your photos for web use by resizing, converting and renaming them. Perhaps you’ll need to add your logo or a copyright text for protection or branding reasons. Perhaps you’ll need to date stamp your photos to document your work. The scenarios can be various. No matter the reason, the best solution is to opt for an image editing software equipped with batch processing capabilities. This way you can automate the process and gain precious time and energy.
Edit Multiple Images in 3 Simple Steps
When it comes to image editing, the first name that pops into your head is Photoshop, right? Well, it’s understandable why. Adobe’s image manipulation software is, after all, the most complex and popular tool you can find. But it’s not always the best. There are specific scenarios where you can resort to other tools to get the job done in an efficient way. Batch processing photos is an operation that can be easily and quickly carried out with a specialized software like BatchPhoto for example.
BatchPhoto is a Windows and Mac editor particularly developed to edit images in bulk. Why should you batch process your pictures with this tool instead of Photoshop? Well, first of all because it’s considerably easier to use. There’s no complex interface, no need to create and save actions. All you have to do is follow a simple 3-step process: add your images in the first step, make the desired edits in the second step and choose your configuration in the third. That’s it.
In addition to being simpler to use, BatchPhoto is also a budget-friendly alternative. As opposed to Photoshop, which requires a monthly subscription fee, BatchPhoto comes with a lifetime license.
Here’s how simple it is to batch edit photos with BatchPhoto:
Step 1
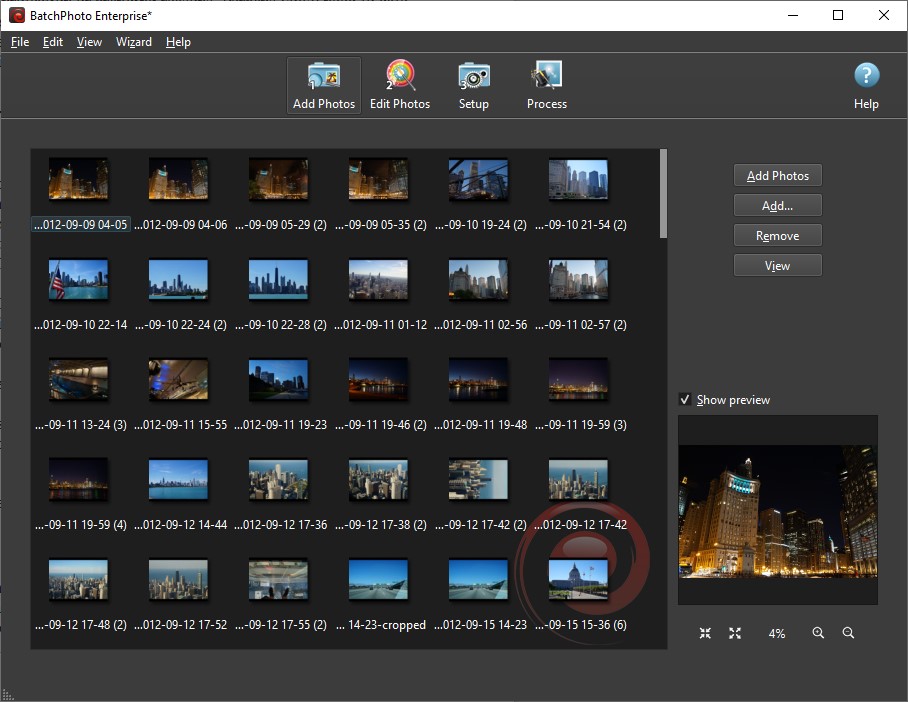
The first step of the process is called Add Photos. Here is where you load the pictures (RAW formats are supported as well) you want to edit. You can add files individually, add a folder with or without subfolders or just use drag & drop. You can see a preview of each picture and also choose to view them as small, medium or large icons or see technical details.
Step 2
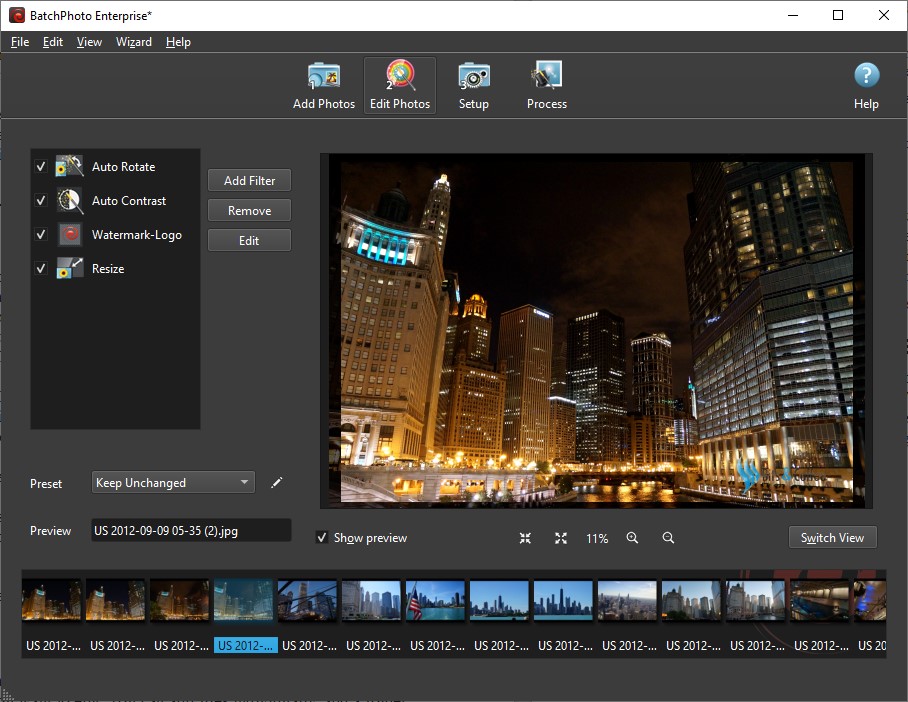
The second step of the process is called Edit Photos. Here is where you can edit your photos with the aid of the built-in filters. Simply click on Add Filter and choose from the 50 options available. The filters are divided into five categories:
Step 3
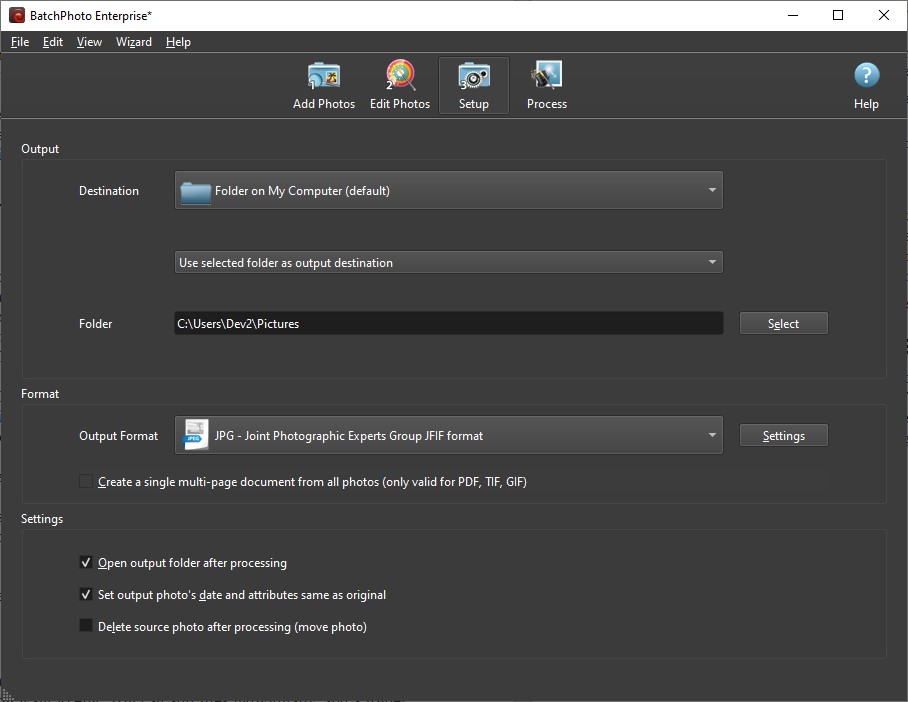
The third step of the process is called Setup. Here is where you choose the destination of your images and the output format. You can save your newly-edited photos on a local folder, upload them to a FTP server or send them via email. As far as the image format goes, the list is quite extensive. You can choose anything from the popular JPG and PNG to AVIF, WebP or PDF.
Once everything is set, all that’s left to do is hit the Process button.
Completely Automate Photo Editing
In addition to batch processing images, BatchPhoto offers a unique feature to completely automate the editing process called Folder Watch.
The feature monitors a folder for newly added photos and automatically applies preset edits to those new photos. What this means is that, basically, you won’t have to do a thing to edit your pictures. All that’s required is to transfer your images to a monitored folder. The program will then automatically apply your preset edits to them.
Another useful option is the fact that you can save your commonly-used operations as Profiles and reuse them in other editing sessions.
